🎂 The Ultimate Guide to Perfect Cake Pops: How to Make Them Without Crumbling, Cracking, or Falling Off the Stick


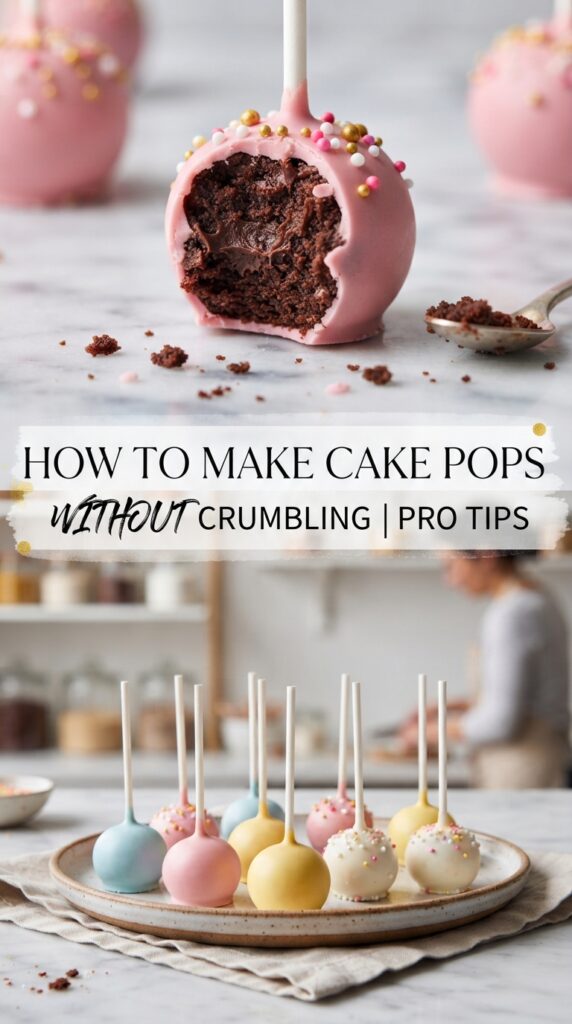
If you’ve ever stared at a tray of cracked, lopsided, or completely collapsed cake pops and wondered “What did I do wrong?” — you’re not alone. Cake pops look effortless, but behind every bakery-perfect pop is a science of ratios, temperatures, and timing.
The good news? Once you master how to make cake pops without crumbling, you’ll never go back to frustrating batches again. This is the only guide you’ll ever need — covering everything from the perfect cake-to-frosting ratio to the secret behind a smooth, crack-free chocolate shell.
Let’s turn your cake pop disasters into dessert masterpieces. 🍰✨
📋 Table of Contents
- Why Do Cake Pops Crumble or Crack?
- Ingredients You’ll Need
- Essential Equipment
- Step-by-Step Cake Pop Recipe
- 7 Pro Tips for Bakery-Perfect Results
- Cake Pop Troubleshooting Chart
- FAQ: Your Cake Pop Questions Answered
- Final Thoughts
🤔 Why Do Cake Pops Crumble or Crack?
Before we dive into the recipe, let’s understand the three most common cake pop failures — and why they happen:
| Problem | Root Cause |
|---|---|
| Crumbling cake balls | Too little frosting, or cake not cooled before mixing |
| Cracking chocolate shell | Temperature shock (cold cake + warm chocolate) |
| Sagging sticks | Too much frosting, or not chilling long enough |
Once you understand the why, the how becomes easy. Let’s fix it. 👇
🛒 Ingredients You’ll Need
For the Cake Balls:
- 1 box (15.25 oz) cake mix (any flavor — vanilla, chocolate, or red velvet work best)
- 1 can (15 oz) frosting (match the flavor to your cake)
- 1 tsp vanilla extract (optional, for extra flavor)
For the Coating & Sticks:
- 20–24 lollipop sticks (4–5 inch paper or plastic sticks)
- 20 oz candy melts or chocolate coating (milk, dark, or white)
- 1 tbsp coconut oil or paramount crystals (for a smooth, glossy dip)
- Sprinkles, edible glitter, or drizzle (for decoration)
💡 Pro Tip: Avoid using real chocolate chips for coating — they’re too thick. Candy melts or chocolate almond bark are formulated specifically for dipping.
🥣 Essential Equipment
- Large mixing bowl
- Baking sheet (lined with parchment paper)
- Cake pop stand or styrofoam block
- Microwave-safe bowl or double boiler
- Small saucepan (optional, for melting)
- Candy thermometer (optional but helpful)
- Spoon or small cookie scoop (1.5 tbsp size)
👩🍳 Step-by-Step Cake Pop Recipe
Step 1: Bake and Cool the Cake Completely
Bake your cake according to package directions (or use your favorite homemade recipe). Let it cool completely — at least 2 hours. Warm cake + frosting = mushy, unshapable balls.
🕒 Time Saver: Crumble the cooled cake into a large bowl and freeze for 15 minutes to speed up the cooling process.
Step 2: Crumble the Cake Finely
Using your hands or a food processor, break the cake into fine, even crumbs. No big chunks! Uniform crumbs = smooth, round cake balls.
Step 3: Mix in the Frosting (The Golden Ratio)
Start with ¾ of the can of frosting and mix it into the cake crumbs using a spatula or your hands. Add more frosting only if needed.
⚠️ Critical Mistake to Avoid: Adding too much frosting is the #1 reason cake pops crumble off the stick or sag during dipping. The mixture should feel like play-dough — moist but firm, not sticky or wet.
Step 4: Roll Into Uniform Balls
Scoop about 1.5 tablespoons of mixture and roll into smooth, even balls (about 1 inch in diameter). Place them on a parchment-lined baking sheet.
Step 5: Chill the Cake Balls (Non-Negotiable!)
Refrigerate for at least 1 hour, or freeze for 15–20 minutes. Cold cake balls hold their shape and prevent cracking when dipped.
Step 6: “Glue” the Sticks
Dip the tip of each lollipop stick into melted candy melts, then insert it halfway into a chilled cake ball. Return to the fridge for 15 minutes to set the “glue.”
🔑 This is the secret step most tutorials skip! Without this, your stick will slide right out during dipping.
Step 7: Melt the Coating Properly
Melt your candy melts in 30-second intervals in the microwave, stirring between each. The ideal temperature is 88–90°F (31–32°C). Add 1 tbsp of coconut oil for a thinner, glossier coating.
🌡️ Too hot? The chocolate will burn and taste bitter. Too cold? It will be too thick and clump on the stick.
Step 8: Dip with Confidence
Hold the stick at an angle and dip the cake ball straight down into the coating. Lift it out, tap the stick gently against the bowl to remove excess, and twirl slowly as you lift.
💡 Twirling is key — it smooths the coating and prevents pooling at the base.
Step 9: Add Decorations Immediately
While the coating is still wet, add sprinkles, drizzle, or edible glitter. Once set, decorations won’t stick.
Step 10: Set and Serve
Stick the pops upright in a cake pop stand or styrofoam block. Let them set at room temperature for 15–20 minutes (avoid the fridge — condensation can cause streaks).
🌟 7 Pro Tips for Bakery-Perfect Cake Pops
- Less frosting is more. Start with ¾ of the can and add gradually.
- Always chill before dipping. Cold cake balls = no cracking.
- Thin your coating with coconut oil or paramount crystals.
- Tap, don’t shake excess chocolate off the stick.
- Use a deep, narrow cup for dipping — it uses less coating.
- Work in small batches of 4–6 pops at a time.
- Store finished pops in a single layer at cool room temperature for up to 3 days, or refrigerate for up to 1 week.
🛠️ Cake Pop Troubleshooting Chart
| Issue | Solution |
|---|---|
| Cake balls crumble when rolling | Add 1–2 tbsp more frosting |
| Cake balls fall off the stick | Use the “glue” technique (Step 6) |
| Chocolate cracks after dipping | Cake balls weren’t cold enough |
| Coating is too thick | Add coconut oil or paramount crystals |
| Coating is too thin | Add more candy melts, less oil |
| Pops sag on the stick | Reduce frosting; chill longer |
| Bumpy surface after dipping | Roll balls smoother; strain coating |
| White streaks on chocolate | Chocolate overheated or seized |
❓ FAQ: Your Cake Pop Questions Answered
Can I make cake pops ahead of time?
Yes! Undipped cake balls can be frozen for up to 6 weeks. Finished cake pops last 3 days at room temperature or 1 week in the fridge.
Why do my cake pops taste like frosting?
You likely added too much frosting. Stick to the ¾-can rule and taste-test the mixture before rolling.
Can I use homemade cake instead of a box mix?
Absolutely! Any moist, tender cake works. Avoid dense cakes like pound cake.
Do I need a cake pop maker?
Nope! The traditional hand-rolled method gives you more control over texture and flavor.
What’s the best cake flavor for cake pops?
Vanilla, chocolate, red velvet, and funfetti are crowd favorites. Experiment with lemon, strawberry, or cookies & cream for a twist!
🎉 Final Thoughts
Making perfect cake pops isn’t about fancy equipment or years of experience — it’s about understanding the ratios, temperatures, and timing that turn simple cake and frosting into show-stopping desserts.
Remember the golden rules:
✅ Cool your cake completely
✅ Use the right frosting ratio
✅ Chill before every step
✅ Glue your sticks
✅ Thin your coating
Follow this guide, and you’ll go from cake pop disasters to bakery-perfect pops that impress every time. 🎂✨
📌 Pin this recipe for later!
💬 Tried this recipe? Leave a comment below and let us know how your cake pops turned out!
🔔 Subscribe for more foolproof baking guides and dessert hacks.
Keywords: how to make cake pops without crumbling, cake pop recipe, cake pop tips, cake pop troubleshooting, why do my cake pops crack, easy cake pop tutorial, bakery style cake pops, cake pop mistakes, cake pop pro tips, dessert hacks