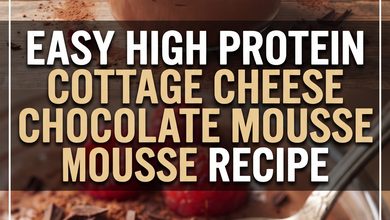
If you are looking for a dessert that tastes like a decadent cheat meal but actually fuels your body, you have found it. Welcome to the Cottage Cheese Peanut Butter Mousse—the viral, high-protein dessert that is taking the internet by storm.
Skeptical about the cottage cheese? Don’t be! When blended, the curds completely disappear, leaving behind a texture that is richer and creamier than traditional dairy mousse. Best of all? It takes just 10 minutes to make, requires no baking, and is packed with nearly 20 grams of protein per serving.
Let’s dive into how to make the perfect, silky-smooth mousse every single time.
Why You’ll Love This Recipe
- High Protein & Low Calorie: Keeps you full and satisfies sweet cravings without the sugar crash.
- 10-Minute Prep: No baking, no cooking, just blend and chill.
- Naturally Sweetened: Refined sugar-free, using honey or maple syrup.
- Incredibly Versatile: Easily adaptable for Keto, Vegan, and Dairy-Free diets.
- Kid-Friendly: The chocolate and peanut butter completely mask the “cheese” flavor.
Ingredients You’ll Need
To get that perfect, airy texture, you need the right ingredients. Here is what goes into the blender:
- 2 cups Cottage Cheese: Full-fat yields the creamiest result, but low-fat (2% or 1%) works perfectly too.
- 1/2 cup Creamy Peanut Butter: Use your favorite brand. Natural peanut butter is great, but standard creamy peanut butter makes it extra smooth.
- 1/4 cup Honey or Maple Syrup: Adjust to your taste. Maple syrup makes it slightly more vegan-friendly (if paired with non-dairy milk).
- 1 tsp Vanilla Extract: Enhances the chocolate and peanut butter flavors.
- 1/4 cup Unsweetened Cocoa Powder: Use high-quality Dutch-processed cocoa for a fudgy, rich flavor.
- 1/4 cup Milk: Dairy milk, almond milk, oat milk, or soy milk. This is crucial for helping the blender run smoothly.
- A Pinch of Salt: Balances the sweetness and makes the chocolate pop.
Step-by-Step Instructions
Follow these steps carefully to ensure your mousse is completely lump-free and perfectly whipped.
Step 1: Prep Your Blender or Food Processor
For the smoothest texture, a high-speed blender (like a Vitamix or Ninja) is best. However, a standard food processor works perfectly fine. Ensure your equipment is clean and dry.
Step 2: Blend the Cottage Cheese and Milk First (The Secret Step!)
Add the 2 cups of cottage cheese and the 1/4 cup of milk to the blender. Blend on high for 30-45 seconds.


- Pro Tip: Blending the cheese and liquid first breaks down the curds before you add the heavy peanut butter. This is the secret to a lump-free mousse!
Step 3: Add the Flavor Ingredients
Scrape down the sides of the blender with a spatula. Add the 1/2 cup peanut butter, 1/4 cup honey/maple syrup, 1 tsp vanilla extract, 1/4 cup cocoa powder, and the pinch of salt.
Step 4: Blend Until Silky Smooth
Blend on high for another 45 to 60 seconds. Stop the blender, scrape down the sides again, and blend for a final 15 seconds. The mixture should look like a thick, glossy pudding.
Step 5: Chill for the Best Texture
While you can eat it immediately, the mousse thickens and becomes much more “mousse-like” when cold. Transfer it to a large bowl or individual serving jars and refrigerate for at least 30 minutes.
Step 6: Top and Serve
Once chilled, give it a quick stir. Top with your favorite garnishes (see the 25 variations below) and enjoy!
25 Ways to Customize, Serve, and Store Your Mousse
Want to switch things up? Here are 25 incredible ways to adapt this base recipe to fit your diet, cravings, and lifestyle.
Dietary Swaps & Variations
- Make it Vegan: Swap dairy milk for oat or almond milk, use maple syrup, and replace cottage cheese with blended silken tofu or vegan cream cheese.
- Make it Keto/Low-Carb: Replace the honey with a sugar-free sweetener like Monk Fruit, Erythritol, or Stevia.
- Make it Dairy-Free: Use your favorite plant-based milk and ensure your chocolate/cocoa is dairy-free.
- Nut-Free Option: Swap peanut butter for Sunflower Seed Butter (SunButter) or soy nut butter.
- Almond Butter Twist: Use creamy almond butter for a slightly more sophisticated, marzipan-like flavor.
- Cashew Butter Swap: Use cashew butter for a milder, ultra-creamy, and slightly sweeter profile.
🍫 Flavor Boosters
- Espresso Mousse: Add 1/2 tsp of instant espresso powder to deepen the chocolate flavor.
- Cinnamon Spice: Add a dash of cinnamon for a warm, cozy flavor profile.
- Mint Chocolate: Add 1/4 tsp of peppermint extract for a “Grasshopper” pie vibe.
- Raw Cacao: Swap regular cocoa powder for raw cacao powder for extra antioxidants.
- Double Chocolate: Fold in 2 tablespoons of mini dark chocolate chips after blending.
- Protein Boost: Add a half-scoop of chocolate or vanilla protein powder (you may need an extra splash of milk).
🍓 10 Dreamy Topping Ideas
- Classic Crunch: Top with crushed roasted peanuts.
- Fresh Berries: Add sliced strawberries or fresh raspberries for a tart contrast.
- Banana Slices: Perfect for a peanut butter-banana-chocolate combo.
- Granola Crunch: Sprinkle your favorite crunchy granola on top.
- Coconut Flakes: Add toasted coconut flakes for a tropical twist.
- Cacao Nibs: Sprinkle cacao nibs for a bitter, crunchy, sugar-free topping.
- Chia or Hemp Seeds: Add a spoonful for extra omega-3s and crunch.
- Sea Salt Flakes: A tiny pinch of flaky sea salt on top elevates the chocolate.
- Whipped Cream: Top with coconut whipped cream or Greek yogurt.
🥣 Creative Ways to Eat It
- Breakfast Bowl: Serve it in a bowl topped with granola and fruit for a high-protein breakfast.
- Fruit Dip: Use it as a thick, protein-packed dip for apple slices or pretzels.
- Stuffed Dates: Scoop it into pitted Medjool dates for a fancy, healthy dessert.
- Protein Toast Spread: Spread it thickly on toasted sourdough or Ezekiel bread.
Storage and Meal Prep Instructions
This mousse is the ultimate meal prep dessert.
- Refrigerator: Store in an airtight container or individual glass jars for up to 5 days.
- Freezer: You can freeze this mousse! Pour it into silicone molds or an ice cube tray, freeze until solid, and transfer to a freezer bag. It makes amazing “mousse bites” that thaw in 10 minutes.
- Make-Ahead Tip: If the mousse separates slightly in the fridge, just give it a vigorous stir before eating to bring back the creamy texture.
Frequently Asked Questions (FAQ)
Can I actually taste the cottage cheese?
No! As long as you blend it thoroughly (especially the Step 2 milk trick), the texture becomes completely smooth. The strong flavors of peanut butter, cocoa, and vanilla completely mask the cheese.
Can I use frozen cottage cheese?
Yes! Freezing and thawing cottage cheese actually breaks down the curds, making it blend even smoother. Just make sure to drain any excess liquid that separates after thawing.
Is this recipe gluten-free?
Yes, the base recipe is naturally gluten-free. Just ensure your cocoa powder and peanut butter are certified gluten-free if you have celiac disease.
📋 Recipe Card: Cottage Cheese Peanut Butter Mousse
- Prep Time: 10 minutes
- Chill Time: 30 minutes
- Total Time: 40 minutes
- Yields: 4 servings
- Calories: ~220 kcal per serving | Protein: ~18g
Ingredients:
- 2 cups cottage cheese
- 1/2 cup creamy peanut butter
- 1/4 cup honey or maple syrup
- 1 tsp vanilla extract
- 1/4 cup unsweetened cocoa powder
- 1/4 cup milk (dairy or non-dairy)
- Pinch of salt
Instructions:
- Blend cottage cheese and milk until smooth.
- Add remaining ingredients and blend until silky.
- Chill for 30 minutes.
- Top with crushed peanuts and a drizzle of chocolate (optional). Serve and enjoy!
Did you make this recipe? Leave a ️⭐️⭐️⭐️⭐️ rating below and tag us on Instagram with your creations!